Troubleshooting Basic Network Connectivity Using A Telnet Client
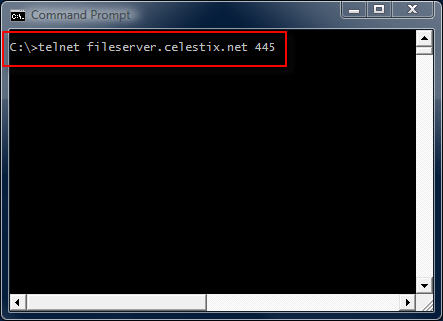
The telnet client included with Windows is a useful low level diagnostic tool. When troubleshooting a network connectivity issue, it is a simple and effective way to determine if you can establish a TCP connection with a remote host on a particular port. The command syntax is:
telnet <IP address, FQDN or hostname> <port>
For example…
telnet fileserver.celestix.net 445
This command instructs the telnet client to open a TCP connection to the server fileserver.celestix.net on port 445 (which is used by SMB). A successful TCP connection was made if the command prompt disappears and you are left with only a flashing cursor.
You can confirm this by monitoring the communication with a protocol analyzer (e.g. Network Monitor or Wireshark) when you execute the command.
Note: The example above uses a fully-qualified domain name (FQDN). When using FQDN’s or hostnames, make certain that name resolution is working properly if you are unable to establish connectivity.
Additional Examples
telnet dc01 389
This command establishes connectivity to dc01 on TCP port 389 (LDAP).
telnet 192.168.1.100 3389
This command establishes connectivity to 192.168.1.100 on TCP port 3389 (RDP).
Unable To Connect
If a connection cannot be established you will receive the following error message:
Could not open connection to the host, on port <port number>: Connect failed
This error message does not explain why the connection could not be established, however. It may be that the remote host was not listening on the specified port, the remote host was not reachable, or perhaps a firewall on the remote host or in the network path between the client and the remote host denied the connection. Looking at the communication with a protocol analyzer provides more information. For example, if the remote host is reachable but not listening on the port requested, the remote host will reply with a TCP reset.

If the remote host was not reachable or a firewall denies the communication there will be no replies.

Telnet Clients
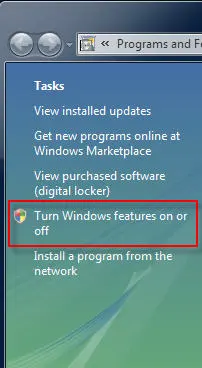
Historically the telnet client has been installed by default on all Windows operating systems. That changed beginning with Windows Vista. With Windows Vista and Windows 7 you will need to open the ‘Programs and Features’ control panel application and in the task pane select the option to ‘Turn Windows features on or off’.
Select ‘Telnet Client’ and choose ‘Ok’ to install it.
On Windows Server 2008 systems it is even easier to install the telnet client. From an elevated command prompt enter the following command:
servermanagercmd -i telnet-client
In addition there are numerous third-party telnet clients available for Windows. Some are free such as the popular Putty telnet client, and some are commercial such as SecureCRT. Third-party telnet clients offer advanced featuers not found in the native Windows telnet client and also support additional protocols such as SSH and RLogin.
In my next post I will demonstrate how to perform basic HTTP troubleshooting using a telnet client.


