Archive
Configuring Roles and Features in Windows Server 2008 R2
Windows Server 2008 includes a command-line utility called servermanagercmd.exe that allows administrators to configure roles, role services, and features from the command line. Beginning with Windows Server 2008 R2, however, servermanagercmd.exe has been deprecated. When you attempt to run servermanagercmd.exe you will receive the following message:
Servermanagercmd.exe is deprecated, and is not guaranteed to be supported in future releases of Windows. We recommend that you use the Windows PowerShell cmdlets that are available for Server Manager.
Servermanagercmd.exe has been replaced with new PowerShell Server Manager cmdlets (pronounced ‘command-lets’). Before we can use these new cmdlets we must first import them. Open an elevated PowerShell command prompt and enter the following command:
import-module servermanager
Here are the three new PowerShell cmdlets and their corresponding servermanagercmd.exe equivalents [in brackets]:
Add-WindowsFeature [servermanagercmd.exe –install]
Get-WindowsFeature [servermanagercmd.exe –query]
Remove-WindowsFeature [servermanagercmd.exe –remove]
For more information regarding the new PowerShell cmdlets and servermanagercmd.exe, please refer to the Overview of Server Manager Commands article on Microsoft Technet.
Microsoft Exchange Server Remote Connectivity Analyzer
My good friend Andy Tang, who works for e92Plus over in the UK, blogged recently about some issues he was having with ActiveSync on IAG. In his post he talks about using a wonderful utility called the Microsoft Exchange Server Remote Connectivity Analyzer. This online tool will allow you to remotely test ActiveSync, Outlook Anywhere (RPC/HTTP), and inbound SMTP. Excellent!
Troubleshooting Basic HTTP Connectivity Using VBScript
As a follow up to my last blog post I wanted to share with you a way to perform basic HTTP connectivity testing using VBScript. Using the GetAllResponseHeaders method of the XMLHTTP object we can easily retrieve and display response headers returned by a web server. The VBScript code looks like this:
Option Explicit
Dim HTTP, Site
Site = InputBox(“Enter site name:”, “Get All Response Headers”)
Set HTTP = WScript.CreateObject(“Microsoft.XMLHTTP”)
Call HTTP.Open(“HEAD”, “http://” & Site, False)
Call HTTP.Send()
MsgBox HTTP.GetAllResponseHeaders(), vbInformation, “Response Headers for ” & Site
Set HTTP = Nothing
Copy the code above to a text file and save it with a .vbs extension. Double-click on the file and you will be prompted to enter a web site to test.
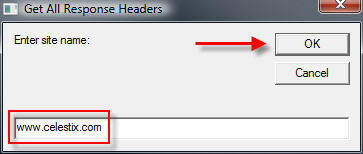
Enter the name of the web site to test and choose ‘Ok’. The script will send a request to the web server and display the response headers returned.
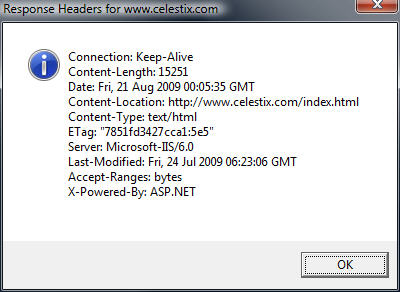
Admittedly this code is very rudimentary, but it is a simple and effective way to troubleshoot HTTP connectivity issues. If you are interested in something similar that has many more features, including the ability to use specific HTTP commands, perform logging, use a proxy server, specify a USER AGENT string and much more, visit Jim Harrison’s ISATools.org and download his very powerful HTTP_TEST VBScript.
Troubleshooting Basic HTTP Connectivity Using A Telnet Client
In my last blog post I demonstrated how to use the Windows telnet client to perform basic network connectivity troubleshooting. In this post I will demonstrate how to use the telnet client to interactively perform basic HTTP troubleshooting.
Note: This post assumes that you have a fundamental understanding of the HTTP protocol. If you are not familiar with HTTP and would like to learn more, there are some excellent books on the subject available. Two books that I recommend are HTTP – The Definitive Guide and the HTTP Pocket Reference, both from O’Reilly Books.
To begin, open a command prompt and enter the command telnet. This will bring up a telnet command prompt.

Notice that the escape character is CTRL+]. We’ll need to know this later. Next, enter the command set localecho. This command allows us see the text that we type in the command window.

To establish a connection to a web server on the default port, the command syntax is open <IP address, FQDN, or hostname> <port>.
For example…
open intranet.celestix.net 80
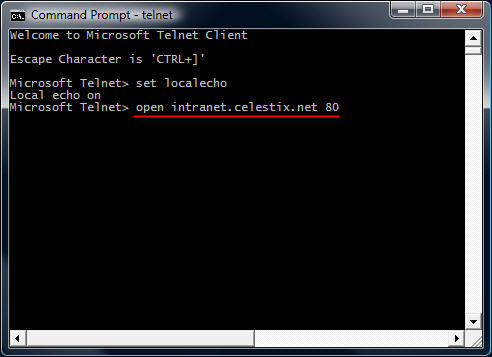
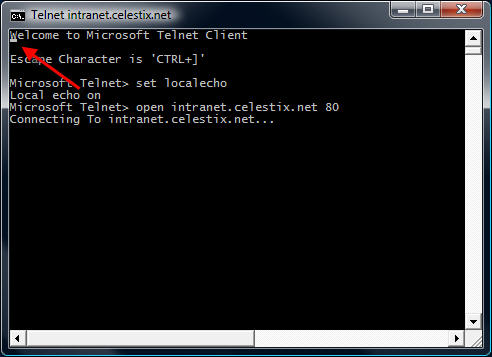
After you enter the open command and hit enter, it is not readily apparent that a connection has been made to the web server. That’s because the cursor immediately jumps to the upper left corner of the command window.
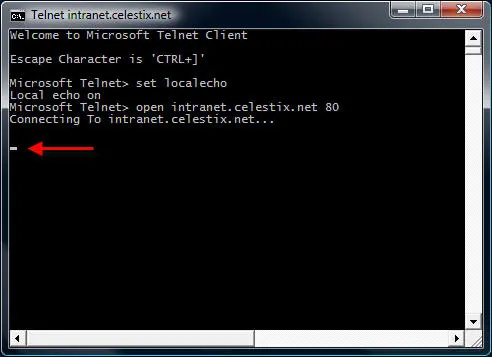
Before entering commands, hit the enter key a few times to bring the cursor to a clear area in the window.
Now that we have established a connection, we are ready to issue some basic HTTP commands to the web server. Let’s begin by retrieving the default web page for the site intranet.celestix.net. Although a full-featured HTTP client will send many request headers to a web server to retrieve content, the RFC specifies that only the HOST header is mandatory for HTTP 1.1. First we will send a GET command requesting the default page, then we will provide the HOST header to let the web server know which web site we are requesting content from (this is required because the web server may be hosting multiple web sites using the same IP address).
To retrieve the default page from intranet.celestix.net, enter the following commands:
GET / HTTP/1.1
HOST: intranet.celestix.net
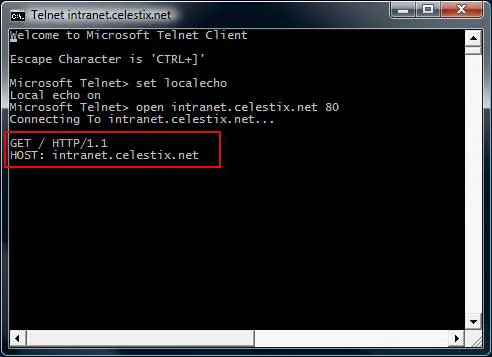
These commands are case sensitive! Be sure to enter them exactly as shown above. After entering the HOST information, hit enter twice to send the commands to the web server. If successful, the web server will respond with the requested content.

Enter the escape command sequence CTRL+] to return to the telnet command prompt.
Additional Examples
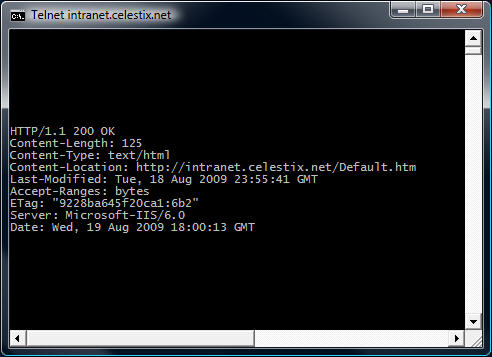
Instead of retrieving the content of the web page, we could request that the web server send response headers only. This can be accomplished by entering the following commands:
HEAD / HTTP/1.1
HOST: intranet.celestix.net
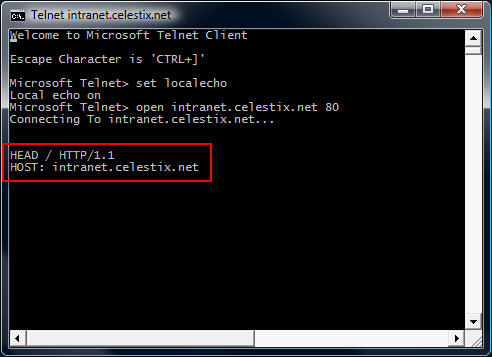
If successful, the web server will send only the response headers and not the content of the web page itself.
Although somewhat useful in troubleshooting basic HTTP communication, the telnet client isn’t the best tool to use. As you will quickly see, the telnet client will not allow you to backspace if you make a typo entering a command. The advantage of using the telnet client is that it is installed on most Windows operating systems by default. Thankfully, a much more robust and feature rich tool is available from Microsoft. WFetch is a GUI utility that allows you to issue many different commands to the web server and includes support for multiple authentication methods. It includes the flexibility to manipulate headers and provides the ability to direct communication through a proxy server. If you are performing advanced troubleshooting or want to learn more about HTTP communication, you can find out more about using WFetch here.
Troubleshooting Basic Network Connectivity Using A Telnet Client
The telnet client included with Windows is a useful low level diagnostic tool. When troubleshooting a network connectivity issue, it is a simple and effective way to determine if you can establish a TCP connection with a remote host on a particular port. The command syntax is:
telnet <IP address, FQDN or hostname> <port>
For example…
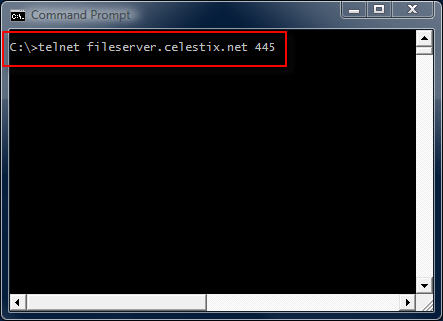
telnet fileserver.celestix.net 445
This command instructs the telnet client to open a TCP connection to the server fileserver.celestix.net on port 445 (which is used by SMB). A successful TCP connection was made if the command prompt disappears and you are left with only a flashing cursor.
You can confirm this by monitoring the communication with a protocol analyzer (e.g. Network Monitor or Wireshark) when you execute the command.
Note: The example above uses a fully-qualified domain name (FQDN). When using FQDN’s or hostnames, make certain that name resolution is working properly if you are unable to establish connectivity.
Additional Examples
telnet dc01 389
This command establishes connectivity to dc01 on TCP port 389 (LDAP).
telnet 192.168.1.100 3389
This command establishes connectivity to 192.168.1.100 on TCP port 3389 (RDP).
Unable To Connect
If a connection cannot be established you will receive the following error message:
Could not open connection to the host, on port <port number>: Connect failed
This error message does not explain why the connection could not be established, however. It may be that the remote host was not listening on the specified port, the remote host was not reachable, or perhaps a firewall on the remote host or in the network path between the client and the remote host denied the connection. Looking at the communication with a protocol analyzer provides more information. For example, if the remote host is reachable but not listening on the port requested, the remote host will reply with a TCP reset.

If the remote host was not reachable or a firewall denies the communication there will be no replies.

Telnet Clients
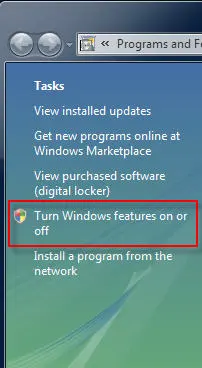
Historically the telnet client has been installed by default on all Windows operating systems. That changed beginning with Windows Vista. With Windows Vista and Windows 7 you will need to open the ‘Programs and Features’ control panel application and in the task pane select the option to ‘Turn Windows features on or off’.
Select ‘Telnet Client’ and choose ‘Ok’ to install it.
On Windows Server 2008 systems it is even easier to install the telnet client. From an elevated command prompt enter the following command:
servermanagercmd -i telnet-client
In addition there are numerous third-party telnet clients available for Windows. Some are free such as the popular Putty telnet client, and some are commercial such as SecureCRT. Third-party telnet clients offer advanced featuers not found in the native Windows telnet client and also support additional protocols such as SSH and RLogin.
In my next post I will demonstrate how to perform basic HTTP troubleshooting using a telnet client.
Ad-hoc Use of Sysinternals Utilities
If you perform any troubleshooting at all in the Windows environment you are no doubt familiar with Mark Russinovich‘s Sysinternals utilities. There is hardly a day that goes by that I don’t use one myself, and I’m not even directly involved in supporting our products!
The tools themselves are fantastic and provide a wealth of information, which is helpful not only for troubleshooting, but for learning as well. Typically you just download the tools and run them from your local system (they don’t require installation – just run them directly!). There are, however, certain times when I’m working on a customer’s machine and I find myself in need of one of these tools, and thanks to Alex Eckelberry’s post on the Sunbelt Blog I’ve learned that you can run them directly from live.sysinternals.com/tools right from the command line! For example…
As long as the system you are working on has Internet access you can use any of the tools in the suite remotely and on an ad-hoc basis.
Be sure to read Alex’s full post on the subject for more information.
