Archive
Controlling ISA Enterprise Configuration Storage Server Replication
One thing I believe that most ISA firewall administrators take for granted is the Configuration Storage server (CSS). Rightfully so however, because with very few exceptions you simply install the CSS (preferably two for redundancy!) and forget about them.
Something that can easily be overlooked with large, complex enterprise deployments with multiple Configuration Storage servers (deployed in multiple geographic locations) is replication. If you are not familiar with the ISA CSS, it is an instance of Microsoft’s Active Directory Application Mode (ADAM); essentially a small, self-contained LDAP directory that is used as the data repository for configuration and policies for Microsoft’s ISA Server 2004 and 2006 Enterprise editions. And exactly like Active Directory Domain Services (AD DS), it is a multi-master database which replicates in much the same way.
When you install the first CSS, a default site is created named ‘Default-First-Site-Name’. When you add additional Configuration Storage servers to this enterprise, regardless of physical location, they are all included in this same default site. In most cases this is not an issue. Having all Configuration Storage servers in a single site ensures that configuration changes between the array members and the CSS are quickly propagated. The assumption of course is that all of these Configuration Storage servers are well connected. If they are not – for instance if you have Configuration Storage servers in your enterprise that are located on the other side of a slow WAN link – this replication can consume a lot of bandwidth and may not be desirable.
In cases such as these it becomes necessary to create ADAM sites, which are identical to AD DS sites. These sites are logical boundaries that typically correspond to physical network locations and can be used to define replication parameters. Intrasite replication assumes that systems are well connected, and as such are optimized for speed. Intersite replication assumes that systems are not well connected, and are therefore optimized for reduced bandwidth consumption.
Configuring ADAM sites is accomplished with the use of the ADAMSites tool. With the ADAMSites tool you can create, view, and delete ADAM sites. Once you have created your ADAM sites you can use the tool to also create, view, and delete site links as well. When creating the site links you can specify the cost of the site link, as well as the replication interval. Once you have established the necessary site links you can then move Configuration Storage servers in to the sites as necessary.
For more information I recommend that you read my good friend Jason Jones’ blog post entitled “Using the ADAM Sites Tool with ISA Server 2006 Enterprise Edition“. Jason also has a very detailed and informative CSS FAQ that is definitely recommended reading for anyone wanting to know more about the Configuration Storage server.
ISA Server Detected Routes…
Another common ISA alert that I often get questions about is the following:
“ISA Server detected routes through the network adapter [network interface] that do not correlate with the network to which this network adapter belongs. When networks are configured correctly, the IP address ranges included in each array-level network must include all IP addresses that are routable through its network adapters according to their routing tables. Otherwise valid packets may be dropped as spoofed. The following ranges are included in the network’s IP address ranges but are not routable through any of the network’s adapters: [address ranges];. Note that this event may be generated once after you add a route, create a remote site network, or configure Network Load Balancing and may be safely ignored if it does not re-occur.
The routing table for the network adapter [network interface] includes IP address ranges that are not defined in the array-level network [network object], to which it is bound. As a result, packets arriving at this network adapter from the IP address ranges listed below or sent to these IP address ranges via this network adapter will be dropped as spoofed. To resolve this issue, add the missing IP address ranges to the array network. The following IP address ranges will be dropped as spoofed: [network object][address ranges];”
Essentially what this alert means is that there is a there is a mismatch between the configuration of the network object in the ISA management console and the routing table of the corresponding network interface. If you are not experiencing any network connectivity issues, or you just made changes to your network configuration, you can probably safely disregard this message. You will not, in most cases, see this message again. If you are seeing this alert on a consistent basis however, you might wish to look at your networking configuration more closely. For the networking to work correctly on the ISA firewall, each network interface should contain routes that correspond to any networks that are reachable through that particular network interface. The network objects in the ISA management console should be configured to include this network and all reachable networks as well. This is critical because if the routing table is configured to include networks that are not included in the ISA network object, the ISA firewall will reject this traffic as spoofed.
There are times when you will have network objects configured with addresses or networks that do not have routes associated with them, and in which case you will see this alert. A case in point would be when a situation arises that you need to exclude a particular address , address range, or subnet that your underlying routing infrastructure routes through another gateway. A common scenario that I have encountered is when registered IP addresses are used for private connectivity over dedicated circuits when connecting to business partners. In this case I would include the IP address(es) of the business partner in the ‘Internal’ network object so that my web proxy and firewall clients would bypass the ISA firewall when communicating with hosts on these networks.
The Perils of Virtualization
With all of the talk recently regarding the availability of Microsoft’s Intelligent Application Gateway (IAG) SP2 and its official support for running in a virtual infrastructure, as well as the support for Microsoft’s Forefront Threat Management Gateway running in virtual environments, there has been a quiet debate running among my colleagues and peers regarding the virtualization of security systems.
I realize that by virtue of the fact that I work for a hardware vendor (Celestix Networks) that my opinions will be considered by many to be biased. Somewhat perhaps, but the fact remains that virtualization, especially the virtualization of a security system, can prove to be extremely risky. Without proper planning, deployment, and ongoing monitoring of the virtual infrastructure the likelihood of a configuration error leading to a total and complete compromise of your security model is extremely high.
For those of you who might think this is just an alarmist’s point of view, I would encourage you to read this story posted recently at InformationWeek.Com. The article talks about a new virtualization security product, but the interesting thing to note here is that it includes a reference to a documented case where the misconfiguration of a virtual network resulted in a sensitive internal database server being connected directly to the public Internet. According to the article, this was put in to operation and was running for some period of time, until someone later discovered the error. Can you imagine if in this case it wasn’t a database server, but a security system responsible for protecting your entire internal private network?
This of course illustrates clearly the point I am trying to make – that there are substantial security risks associated with virtualizing your security infrastructure. Yes, there are some benefits, but I firmly believe that the risks far outweigh the rewards.
ISA Server 2006 Workgroup Deployment Certificate Renewal
One question that I hear with regularity is “how do I renew the machine certificate for my CSS?” when ISA Enterprise is configured in a workgroup. In the past I have recommended running a repair from the installation media, then specifying the new certificate when prompted by the installation wizard. Recently I asked my good friend Yuri Diogenes if there was a better or easier way to accomplish this. In an article he just published on the ‘Tales From The Edge’ community site, he recommended using the ISACertTool utility.
The ISACertTool can be downloaded from Microsoft here. Before running the ISACertTool, make sure that you have a valid server certificate available in an exported (.pfx) file. Also, be sure to place the root certificate of the issuing CA is in a location that is accessible to all array members before running the tool. Once you have downloaded and extracted the ISACertTool according to the documentation, open a command window and execute the following command:
isacerttool.exe /st filename /pswd password /keepcerts
/st filename installs the exported certificate on the CSS. filename specifies the path and name of the exported certificate file.
/pswd password specifies the password that may be required when installing the server certificate
/keepcerts specifies that existing certificates should not be deleted.
Extract the ISACertTool on each array member, then open a command prompt and execute the following command:
isacerttool.exe /fw filename
/fw filename installs the root CA certificate in the local computer store. filename is the path and name of the root CA certificate.
ISA Connectivity Verifier Refresh Rate
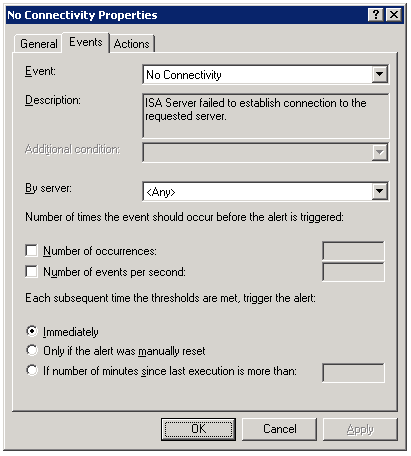
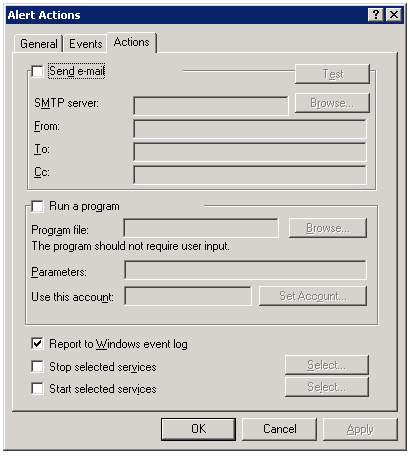
One of the advanced features of the Microsoft ISA firewall’s monitoring capabilities is the connectivity verifier. A connectivity verifier allows us to monitor services on remote hosts that the ISA firewall depends upon to provide service (such as infrastructure services like DNS or Active Directory domain controllers), or perhaps that the ISA firewall is responsible for protecting (such as a published server). When you configure a connectivity verifier, you have the option to choose from one of three methods of verifying connectivity; you can send an HTTP ‘GET’, send a ping (ICMP) request, or establish a TCP connection to a specific port (obviously your best choice!). In the event a monitored resource fails to respond to a connectivity verifier, a no connectivity alert is raised for which you can configure any number of responses, such as recording the event in the event log, sending an e-mail to an administrator, stopping or starting services, or running a program. We also have the ability to control the number of times an event occurs before the alert is triggered, as well as what happens when the alert thresholds are met subsequent to the alert.
By default, connectivity verifiers are configured to perform their checks once every thirty seconds. In some instances, however, this may not be adequate. While there is no option in the GUI to alter this parameter, it is exposed via COM. Please refer to the Microsoft KB article Setting the Refresh Rate for Connectivity Verifiers for more information and to find the VBScript that allows this configuration change to be made.
Automatic Detection Fails for ISA Firewall Clients
When configuring the Web Proxy listener on a Microsoft ISA firewall, one of the things you will find in addition to the authentication methods available is an option to ‘require all users to authenticate’.
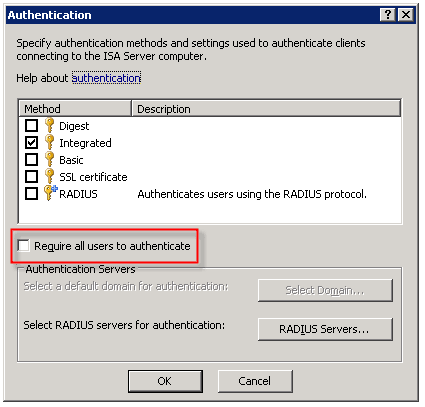
Selecting this option produces the following warning message:
Now why would Microsoft give us this option, then complain when we attempt to use it? I have no idea. But it is important to read this message thoroughly and understand what it is saying and why.
As the message indicates, requiring all users to authenticate may block traffic to sites such as Windows Update. The reason for this is that the Windows Update client on our servers and workstations runs in the background, under the context of the service host (svchost.exe) and is unable to provide authentication information to the ISA firewall. This same scenario applies to any unattended processes or services you might have running that require access to the Internet.
One thing that the warning message does not mention is that requiring all users to authenticate to the Web Proxy listener also breaks the automatic detection mechanism for Firewall Clients. The reason for this is that the ISA Firewall Client lacks the ability to respond correctly to the ‘HTTP 401 Unauthorized’ response that the ISA firewall returns when the Firewall Client attempts to retrieve the ‘wspad.dat’ file.
As the aforementioned warning goes on to say, Microsoft recommends enforcing user authentication on firewall policy access rules and publishing rules instead of requiring all users to authenticate to the Web Proxy listener. In this case it would seem that just because you can, doesn’t mean you should. If you must for some reason enable this setting (and honestly, I can’t think of any reason you would need to) there are some workarounds to allow automatic detection by the Firewall Client under these circumstances. Refer to Microsoft knowledge base article 88563 for more information.
DNS Resolver Behavior in Windows Vista
Recently while working with one of my customers I came across some odd behavior on a Windows Vista client workstation. We noticed that Windows Vista workstations that were configured as Web Proxy and Firewall Clients only (no default gateway) were unable to access non-web based remote resources (e.g. RDP and FTP) by hostname (single label or fully qualified). They could, however, connect by IP address. The odd thing was that Windows XP clients configured in the identical manner did not exhibit this behavior. Windows XP clients configured as Web Proxy and Firewall Clients without a default gateway could access non-web based remote resources without issue, by hostname or IP. In either case, web proxy communication (HTTP, HTTPS, tunneled FTP) worked perfectly.
Name resolution on the Windows Vista client worked flawlessly, so I opened a case with Microsoft so they could shed some light on this for me. After some additional research on their part they were able to determine that this was expected behavior on Windows Vista. Apparently the DNS resolver in Windows Vista filters out hostnames for destinations that are not reachable from the local host. Without a default gateway, Vista had determined that it couldn’t connect to the resource because it had no route to the remote network (obviously not aware of the Firewall Client) and so communication fails.
The resolution was simple enough…add static routes to any remote internal networks, or if Winsock access to the general internet was required, then add a default gateway. And while you may not encounter this particular scenario in complex, large scale corporate networks, it is fairly common in small, flat networks deployed at many SMB’s. If you are like me and have recommended in these scenarios that you deploy only the Firewall Client, it appears that option is no longer available.
Importing Hammer of God Country IP Block Network Sets Into ISA Enterprise Policies
Recently I was called upon to assist a customer with configuring their ISA firewall to block all traffic to or from specific country IP address blocks. Fortunately this task is made much simpler thanks to the wonderful work by Thor at Hammer of God. At the Hammer of God web site you can download pre-configured ISA computer sets that you can easily import in to your ISA firewall configuration.
These networks sets were exported from ISA 2006 Standard edition. If you are importing these computer sets in to the Standard version of Microsoft ISA Server, the process is very straightforward. Simply download the computer set for the country you wish to block and import them in to your policy. If you wish to import these computer sets in to ISA 2006 Enterprise, that’s a little different. ISA does not support importing/exporting objects to/from Standard and Enterprise versions natively. There is a workaround, however. It can be accomplished easily by changing the fpc4:Edition element in the XML export file from “16” to “32”, as shown here…

…but that will only allow you to import the network set in to an array policy. If you would like to import these network sets in to an an enterprise policy, you can follow the procedures outlined here.
Start by downloading a network set from Hammer of God. For demonstration purposes here I have chosen the network block for the country of Albania (nothing personal against Albania, it’s just that the network set was small and convenient!).
1. Create a computer set at the enterprise level. Give the computer set a descriptive name, then choose ‘Ok’ to continue.
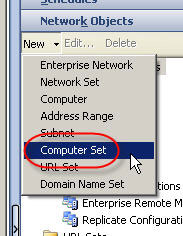
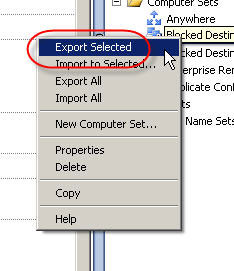
2. Hightlight the computer set you just created, then right-click on the computer set and choose ‘export selected’.
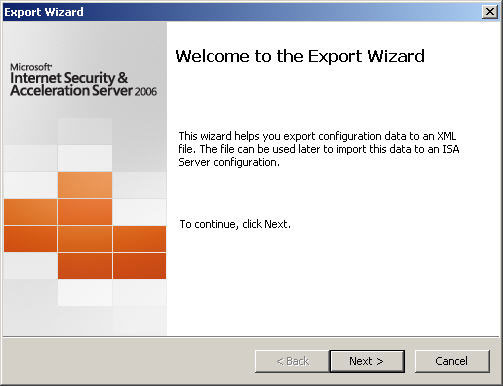
3. The ‘Welcome to the Export Wizard’ dialog box appears. Choose ‘Next’ to continue.
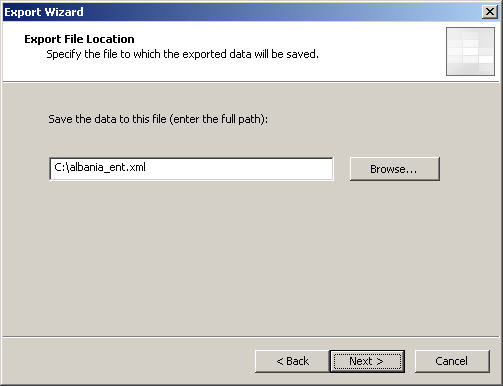
4. Specify the file name and location to save the export to. Choose ‘Next’ to continue.
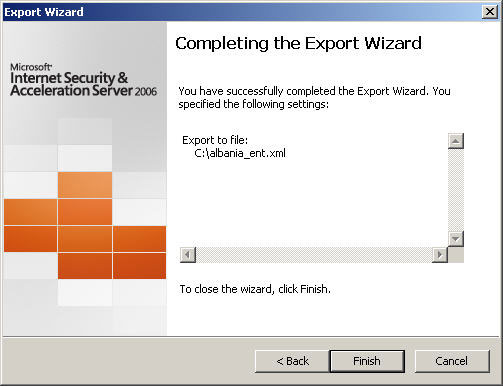
5. Choose ‘Finish’ to complete the export.
6. Next, open the network set downloaded from Hammer of God with an XML editor or Notepad. Select and copy all of the data between and including the fpc:4AddressRanges tags…
7. Open the blank enterprise network set export created earlier with an XML editor or Notepad. Highlight and select the entire following line:
Paste the data you copied previously here, then save the file.
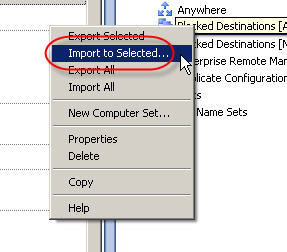
8. In the ISA Management console, highlight the blank enterprise network set created earlier and choose ‘import to selected’.
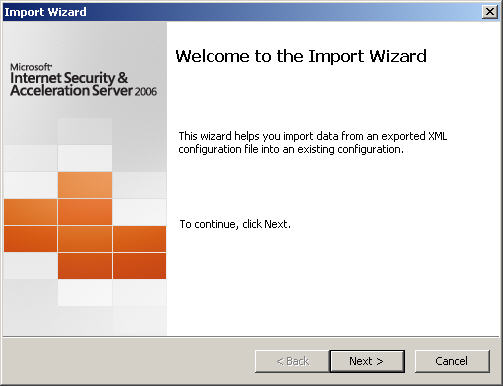
9. The ‘Welcome to the Import Wizard’ dialog box appears. Choose ‘Next’ to continue.
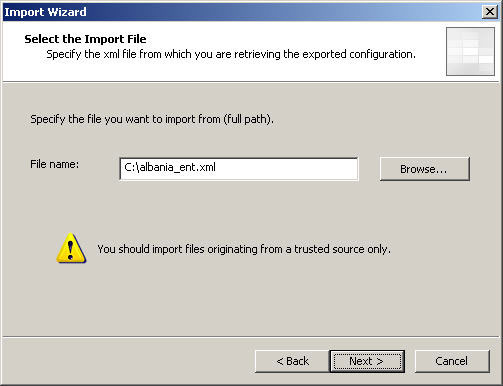
10. Specify the location of the file you just saved, then choose ‘Next’ to continue.
11. Choose ‘Finish’ to complete the import, then apply the changes to the enterprise configuration.

Your enterprise network set is now populated with information and is ready to be used in both enterprise policies and array policies.
