Archive
Win a Signed Copy of Forefront TMG 2010 Administrator’s Companion
To celebrate the end of a very successful 2011 for my blog, I am giving away another copy of the Forefront Threat Management Gateway (TMG) 2010 Administrator’s Companion signed by all of the authors – Jim Harrison, Yuri Diogenes, Mohit Saxena, and Tom Shinder!
To be eligible to win, all you have to do is comment on this post and tell me how I, or one of my blog posts, helped you with a particular issue. On Friday, December 30, 2011, I will select one lucky reader to receive this book. As an added bonus, I will also include a copy of Yuri Diogenes and Tom Shinder’s Deploying Forefront Threat Management Gateway (TMG) 2010, also signed by both authors!
Enter now for a chance to win this great prize! I will ship the book to any country too. Sorry, previous winners are not eligible.
Forefront TMG 2010 Protocol Direction Explained
When reviewing the configuration of a pre-defined protocol or creating a custom protocol on the Forefront TMG 2010 firewall, many new (and sometimes even veteran) firewall administrators can be confused by the protocol direction. The correct configuration of the protocol direction is essential for proper firewall operation, but there are times when it can be somewhat unintuitive. In this post I’ll provide some clarification.
TCP
For TCP protocols the direction can be specified as either inbound or outbound.

For access rules, protocol direction is configured as outbound. Traffic flows outbound from the source to the destination. This is true even when creating an access rule to allow traffic inbound to the Forefront TMG 2010 firewall itself. It sounds counterintuitive, but the TCP protocol direction for access rules allowing access to the Local Host network should still be outbound. Why? Again, because traffic flows outbound form the source to the destination, in this case the TMG firewall’s Local Host network. If, in this case, you were to configure the protocol direction as Inbound (intuitively, inbound to the TMG firewall) it will not work.
For publishing rules, protocol direction is configured as inbound. Traffic flows inbound from the source to the published service on the Forefront TMG 2010 firewall. Pre-defined server publishing protocols include the “server” suffix, as shown here:

UDP
For UDP protocols the direction can be specified as either Receive, Receive Send, Send, or Send Receive.

For access rules, protocol direction is configured as Send. Traffic is sent from the source to the destination. If a response is expected then the protocol direction is configured as Send Receive. This is required because UDP is connectionless and the return traffic would otherwise be denied by the TMG firewall.
For publishing rules, protocol direction is configured as Receive. Traffic is received by the TMG firewall from the source to the published service on the Forefront TMG 2010 firewall. If a response is expected then the protocol direction would be configured as Receive Send.
IP and ICMP
For IP and ICMP protocols the direction can be specified as either Send or Send Receive.

IP and ICMP protocol definitions are only supported for access rules, so protocol direction is configured as Send. As with UDP, IP and ICMP are connectionless and if a response is expected then the protocol direction is configured as Send Receive.
Installing Forefront TMG 2010 SP2 on Enterprise Arrays
July 4,2012 – Update: A script is now available on ISATools.org that will identify the exact order in which to install TMG SP2 for your environment. You can download the script here.
To successfully install Service Pack 2 (SP2) for Forefront TMG 2010, you must first install Service Pack 1 (SP1), then Software Update 1 for SP1 (SP1U1) as I indicated in a previous blog post. None of the other hotfix rollups available for Forefront TMG are required to upgrade to SP2. For Forefront TMG 2010 enterprise arrays, these updates must be installed in a specific order to eliminate potential conflicts. The proper sequence is as follows:
First, install SP1 for Forefront TMG 2010 on the…
- Enterprise Management Server (EMS)
- Reporting server in each array
- Remaining array members in each array
Next, install Software Update 1 for Forefront TMG 2010 SP1 on the…
- EMS
- Reporting server in each array
- Remaining array members in each array
Lastly, install SP2 for Forefront TMG 2010 on the…
- EMS
- Reporting server in each array
- Remaining array members in each array
For standalone arrays, treat the array manager as the EMS and follow the order outlined above. In addition, if you are adding a new array member to an existing array, install Forefront TMG 2010 and apply the updates in order before joining the array. Make certain that the new array member is at the same update level as the EMS and other array members. Also, consider slipstreaming SP2 with your installation media to save yourself some time.
Special thanks to Jim Harrison for clarification on the installation order.
Updating SQL Server on Forefront TMG 2010
Keeping the base operating system of your Forefront TMG 2010 firewall up to date is vitally important to the overall security of your edge security solution. To manage system updates, many administrators will configure their Forefront TMG 2010 firewalls to use Windows Update or WSUS, or manage them using System Center Configuration Manager (SCCM) or another third-party systems management platform.
In my experience, SQL server running on the Forefront TMG 2010 firewall is often overlooked and commonly not updated. I believe this happens because updates for SQL server are classified as optional.
So, as a reminder, don’t overlook updates for SQL server on Forefront TMG 2010 firewalls or UAG 2010 servers! Using the Windows Update control panel application, select the option to install the latest service pack for Microsoft SQL Server 2008, which at the time of this writing is Service Pack 3. You can install the service pack directly if you choose; SQL Server 2008 Express SP3 can be downloaded here. After applying the latest service pack you can confirm that SQL has been updated by opening an elevated command prompt and entering the following commands:
osql -E -S .\msfw

select @@version [press enter]
go [press enter]
The output of the command should indicate that the installed SQL version is Microsoft SQL Server 2008 (SP3) – 10.0.5500.0 (X64).
Note: Applying service packs and updates to SQL is highly recommended to maintain the most secure Forefront TMG 2010 firewall possible. Upgrading the version of SQL installed on the TMG firewall is not supported and definitely not recommended, so don’t attempt to upgrade to SQL Server 2008 R2 Express.
Forefront TMG 2010 Turns Two Years Old
Today marks the second anniversary of the release to manufacturing (RTM) for Microsoft Forefront Threat Management Gateway (TMG) 2010. In the two years since its release Microsoft has provided two major service packs that have increased stability, improved performance and scalability, and also added some helpful new functionality. During this time the product also achieved Common Criteria (level EAL4+) certification. As we approach the end of mainstream support for Microsoft ISA Server 2006 SP1, now is a good time to begin evaluating Forefront TMG 2010 and to start planning your migration!
Microsoft Security Bulletin MS11-083 and Forefront TMG 2010
Included in the November Microsoft security bulletin release was security update MS11-083 (KB2588516) that addresses a critical vulnerability in TCP/IP that could allow remote code execution. Forefront TMG 2010 firewalls are protected from this vulnerability, as the firewall engine’s kernel mode driver processes packets even before the operating system sees them. More information about how the Forefront TMG 2010 firewall engine and service work can be found here [this document is for ISA, but TMG is similar]. Although the underlying operating system’s TCP/IP networking stack is protected by the Forefront TMG firewall engine driver, TMG administrators are still strongly encouraged to install the MS11-083 update as soon as possible.
Error 0x8004FE2F Activating Windows on Forefront TMG 2010 Protected Network
When attempting to activate Windows Server 2008R2 you may receive one of the following error messages:
A problem occurred when Windows tried to activate. Error Code 0x8004FE2F
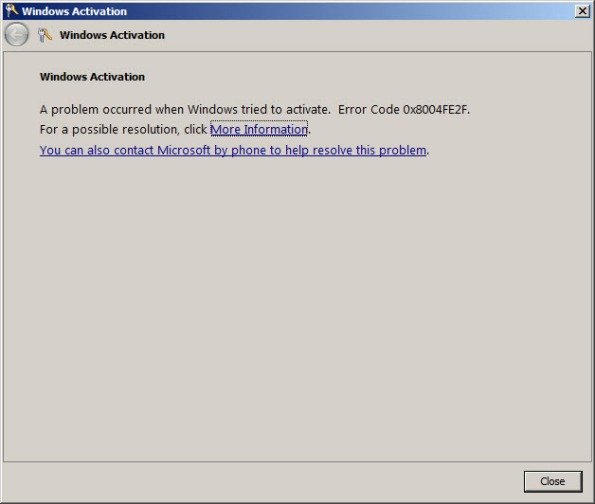
Or…
A problem occurred when Windows tried to activate. Error Code 0xC004FC03
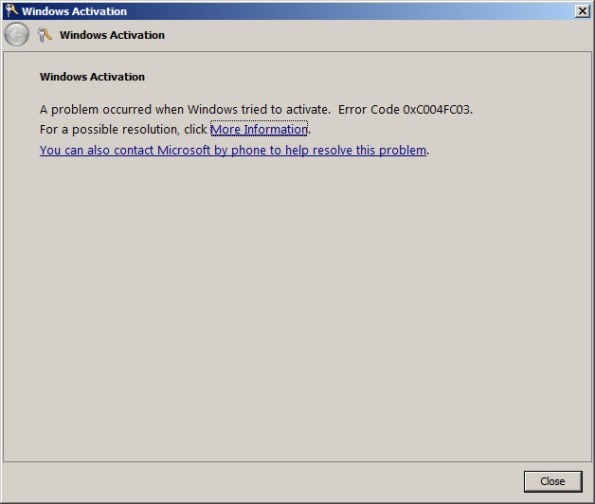
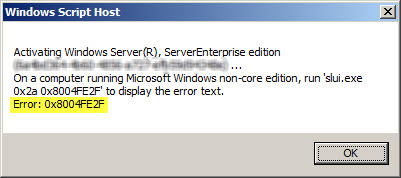
If you attempt to activate Windows from the command line using slmgr.vbs -ato you may also encounter one of the following error messages:
Activating Window Server(R), ServerEnterprise edition {GUID}...
On a computer running Microsoft Windows non-core edition, run 'slui.exe
0x2a 0x8004FE2F' to display the error text.
Error: 0x8004FE2F
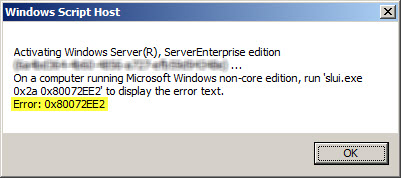
Or…
Activating Window Server(R), ServerEnterprise edition {GUID}...
On a computer running Microsoft Windows non-core edition, run 'slui.exe
0x2a 0x80072EE2' to display the error text.
Error: 0x80072EE2
The problem may occur for systems that are located on a network that is protected by a Forefront TMG 2010 firewall, and the access rule that allows the traffic requires authentication. The Windows activation process relies on WinHTTP and by default, WinHTTP communication is sent as SecureNAT client traffic. SecureNAT clients unfortunately cannot be authenticated, so the request fails.
There are two ways resolve this issue. The first is to configure WinHTTP on the Windows system you are trying to activate to use a proxy serverexplicitly. Open an elevated command prompt and enter the following command:
netsh winhttp set proxy <name or IP address of proxy server>:<port>
For example:
netsh winhttp set proxy tmg.richardhicks.net:8080
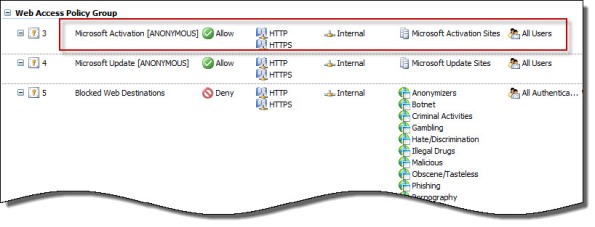
Instead of making this change to each system you want to activate, an alternative is to create an anonymous access rule on the Forefront TMG 2010 firewall that allows HTTP and HTTPS traffic to those destinations required to activate Windows. Using the Forefront TMG 2010 management console, create an access rule that allows HTTP and HTTPS from the Internal network to a Domain Name Set that contains the following destinations for all users:
activation.sls.microsoft.com.nsatc.net
go.microsoft.com
*.sls.microsoft.com
Make sure this rule is placed before any other rules for HTTP or HTTPS that require authentication.
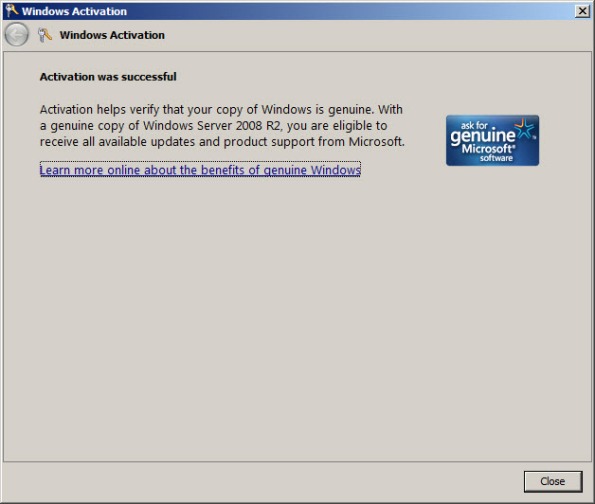
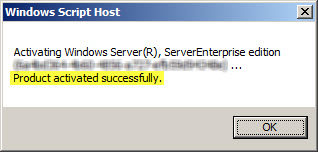
Once configured, activating Windows should work without issue.
Configuring Forefront TMG 2010 HTTPS Inspection Inclusion List
When HTTPS inspection is configured and enabled on a Forefront TMG 2010 firewall, the administrator has the option to define web sites to exclude from HTTPS inspection. This may be required for a variety of reasons. For example, an administrator may need to exclude certain destinations to address privacy concerns, or perhaps HTTPS inspection breaks an application that uses SSL to tunnel non-HTTP protocols. All HTTPS web sites are inspected except for those sites defined as Destination Exceptions.

Beginning with Service Pack 2 (SP2) for Forefront TMG 2010, administrators can now define an explicit inclusion list for HTTPS inspection. Sites included on this list will be subject to HTTPS inspection, while all other destinations will be excluded. To define an HTTPS inspection inclusion list, create a Domain Name Set and populate it with those destinations for which you explicitly want to enforce HTTPS inspection.

After saving and applying the configuration, copy this VBScript file to the TMG firewall, then open an elevated command prompt and type the following command:
cscript.exe ConfigureHTTPSiInclusionList.vbs <DomainNameSetName>
Substitute <DomainNameSetName> in the command above with the name of the Domain Name Set created earlier. Once configured, the Destination Exceptions tab of the HTTPS Outbound Inspection properties will be greyed out, and only those sites included in the Domain Name Set defined as the HTTPS inspection inclusion list will be subject to HTTPS inspection. All other destinations will be excluded. You can still define Source Exceptions as needed, however.

Only one Domain Name Set can be specified as the HTTPS inspection inclusion list. Running the command without parameters removes any configured inclusion list and returns HTTPS inspection back to its original state.
For more information regarding HTTPS inspection inclusion lists, refer to KB2619986.
Slipstream Service Pack 2 for Forefront TMG 2010
Now that Service Pack 2 (SP2) for Microsoft Forefront TMG 2010 is available I’ve had numerous people ask me about the process of slipstreaming the service pack with the Forefront TMG 2010 installation media. Having Forefront TMG 2010 with SP2 slipstreamed is a great time saver if you install TMG frequently like I do, but it is also essential if you wish to install Forefront TMG 2010 on a read-only domain controller (RODC). Last year when service pack 1 for Forefront TMG 2010 was released I wrote this post on how to slipstream the service pack. The process is nearly identical with Forefront TMG 2010 SP2 with the exception that there are a few more steps required because of TMG SP2’s dependencies on SP1 and software update 1 for TMG SP1.
To slipstream SP2 with the Forefront TMG 2010 installation media, begin by copying the contents of your Forefront TMG 2010 DVD or extracting the ISO to a temporary folder. Next, download Forefront TMG 2010 SP1, Forefront TMG 2010 SP1 software update 1, and Forefront TMG 2010 SP2. Software update 1 for Forefront TMG 2010 SP1 and SP2 for Forefront TMG 2010 are both .exe files that can’t be used for slipstreaming. To support slipstreaming we’ll need to extract the .msp files from them by opening an elevated command prompt and issuing the following commands:
For software update 1 for Forefront TMG 2010 SP1
TMG-KB2288910-amd64-ENU.exe /t d:\temp\SP1U1
For Forefront TMG 2010 SP2
TMG-KB2555840-amd64-ENU.exe /t d:\temp\SP2
Now begin the slipstreaming process by navigating to the \FPC folder of the TMG installation source and then issuing the following commands:
First, slipstream SP1 for Forefront TMG 2010
msiexec /a MS_FPC_Server.msi /p d:\temp\sp1\TMG-KB981324-AMD64-ENU.msp
Next, slipstream software update 1 for Forefront TMG 2010 SP1
msiexec /a MS_FPC_Server.msi /p d:\temp\sp1u1\TMG-KB2288910-amd64-ENU.msp
Finally, slipstream Forefront TMG 2010 SP2
msiexec /a MS_FPC_Server.msi /p d:\temp\sp2\TMG-KB2555840-amd64-ENU.msp
Once complete, use your favorite tool to burn a DVD or create an ISO file.
Important Note: If you install the Forefront TMG 2010 firewall client from the new SP2 slipstreamed installation source, you will still need to install the October 2011 Forefront TMG 2010 firewall client hotfix rollup as outlined in my previous blog post.
Configuring Forefront TMG for Microsoft System Center Data Protection Manager (DPM) 2010
Microsoft System Center Data Protection Manager (DPM) 2010 is a management product that provides data protection for Windows systems. More advanced than Windows Backup, DPM uses Protection Agents that provide advanced capabilities. Getting the DPM server to communicate with the Protection Agent installed on a Forefront TMG 2010 firewall can be challenging, however. DPM server-to-agent communication takes place over several non-standard ports, and it also relies on DCOM. Unfortunately the Forefront TMG RPC filter does not fully support DCOM , so we’ll need to employ a workaround to ensure that DPM communication works correctly.
[Note: Many resources that I found on the Internet detailing how to configure TMG for DPM were incorrect and didn’t work. Those that did work didn’t explain why, involved unnecessary steps, or included very broad rule sets that allowed more access to the TMG firewall than absolutely necessary. In this post I’ll provide a definitive and comprehensive guide to preparing the TMG firewall to work with DPM and its Protection Agent, while at the same time adhering to the principle of least privilege and maintaining the lowest possible attack surface.]
As stated, DPM uses Protection Agents installed on each system it manages and protects. This agent can be deployed remotely from the DPM console or installed manually and later ‘attached’. When installing the Protection Agent on a Forefront TMG 2010 firewall it is recommended that the agent be installed manually following the instructions here. Since there is no system policy access rule for DPM, we’ll need to configure access rules to allow the required communication to and from the Protection Agent on the TMG firewall and the DPM server. Begin by creating three new protocols as follows:
DPM Agent Coordinator – TCP 5718 outbound
DPM Protection Agent – TCP 5719 outbound
DPM Dynamic Ports – TCP 50000-50050 outbound
Create a Computer or a Computer Set network object that includes the IP address of your DPM server. DO NOT add the DPM server to the Enterprise Remote Management Computers or Remote Management Computers network objects.
Next, create an access rule called DPM [Inbound]. The action will be allow and the protocols will include the three new protocols you just created, along with Microsoft CIFS (TCP) and RPC (all interfaces). The source will be the DPM server and the destination will be Local Host for all users. Now right-click on the access rule and choose Configure RPC protocol.

Uncheck the box next to Enforce strict RPC compliance and choose Ok.

Create another access rule called DPM [Outbound]. The action will be allow and the protocols will include only DPM Agent Coordinator [5718] and DPM Dynamic Ports [50000-50050]. The source will be Local Host and the destination will be the DPM server for all users. Once complete the rule set should look like this:
Next, right-click the Firewall Policy node in the TMG management console navigation tree and select All Tasks | System Policy | Edit System Policy. Under the Authentication Services configuration group highlight Active Directory. Select the General tab and uncheck the box next to Enforce strict RPC compliance.
The last step required to allow the DPM server to communicate with a Protection Agent installed on the TMG firewall involves making registry changes to restrict RPC communication to a specific range of ports. This is necessary because, as I mentioned earlier, the TMG RPC filter does not fully support DCOM and is unable to manage the dynamic port assignments required for this communication. This change must be made to both the TMG firewall and the DPM server. To make this change, open the registry editor on each system and navigate to the HKLM\Software\Microsoft\Rpc\Internet key.
Create the following new keys:
Ports – REG_MULTI_SZ, 50000-50050
PortsInternetAvailable – REG_SZ, Y
UseInternetPorts – REG_SZ, Y
You can download a .reg file and the TMG access policies here.
Note: For this limited demonstration I have chosen to restrict the dynamic port range to 50 ports. In a real production environment, you may need to increase this limit. An excellent reference article that includes a formula to determine the number of ports required can be found here.
Once the registry changes have been made, the system will have to be restarted for the changes to take effect. After both systems are back online, install the Protection Agent manually on the TMG firewall and then attach the agent in the DPM management console. You can now manage TMG firewall protection in DPM just as you would any other Windows system.
